Spring boot基本使用及 stater机制原理_踩踩踩从踩的博客-CSDN博客
前面文章对于springboot得基本使用以及stater机制 以及autoconfig 做了一个解读,如何手写一个starter的包,对于 自动装配 解读,有了个大概的思维;这篇文章继续讲解SpringBoot的核心源码 ,然后深入的解析整个Springboot怎么快速的构建项目 并管理我们的依赖jar包等等。
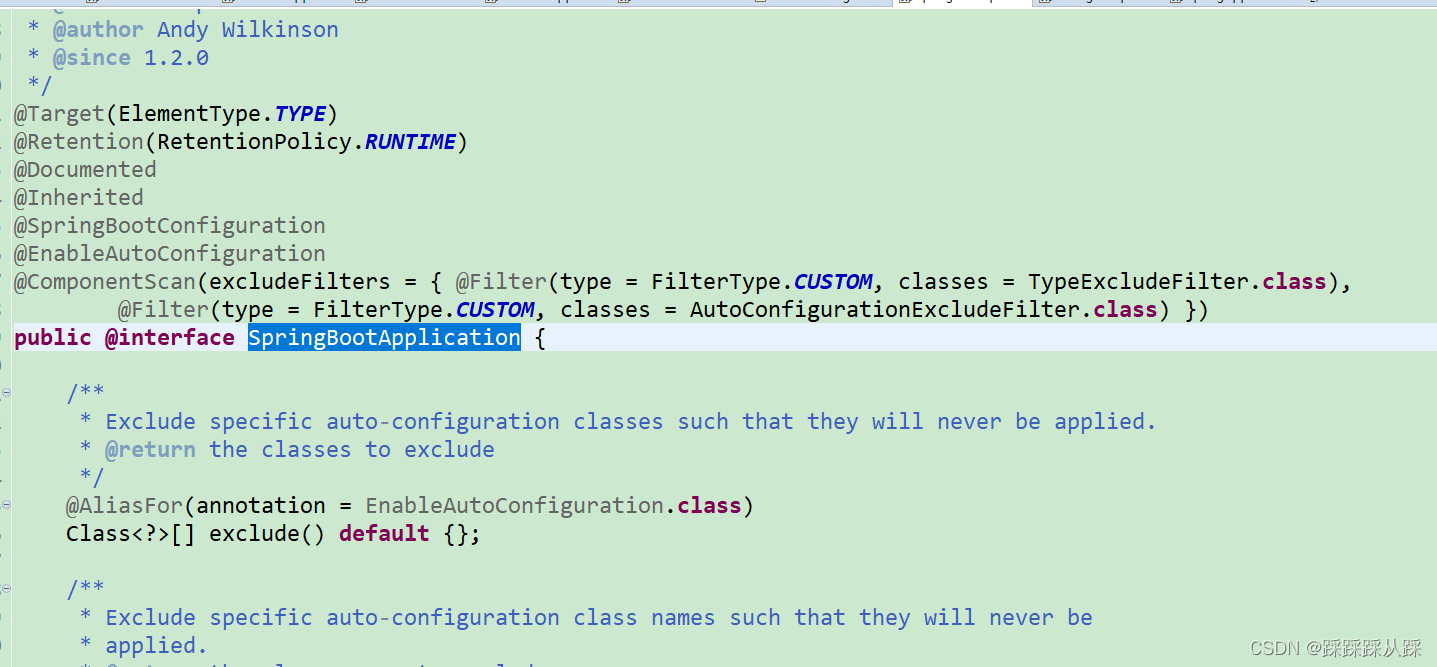
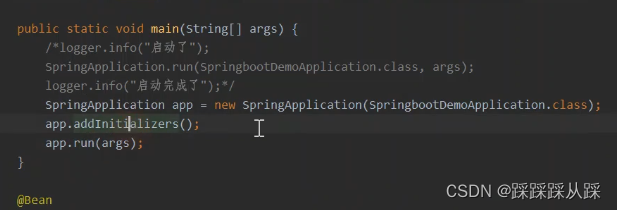
Application启动类
@SpringBootApplication public class DeviceManagerApplication extends SpringBootServletInitializer { public static void main(String[] args) { SpringApplication.run(DeviceManagerApplication.class, args); } @Override protected SpringApplicationBuilder configure(SpringApplicationBuilder builder) { return builder.sources(DeviceManagerApplication.class); } }
入口方法SpringApplication.run
对于springboot 只需要运行run方法就可以将我们的程序给运行起来。
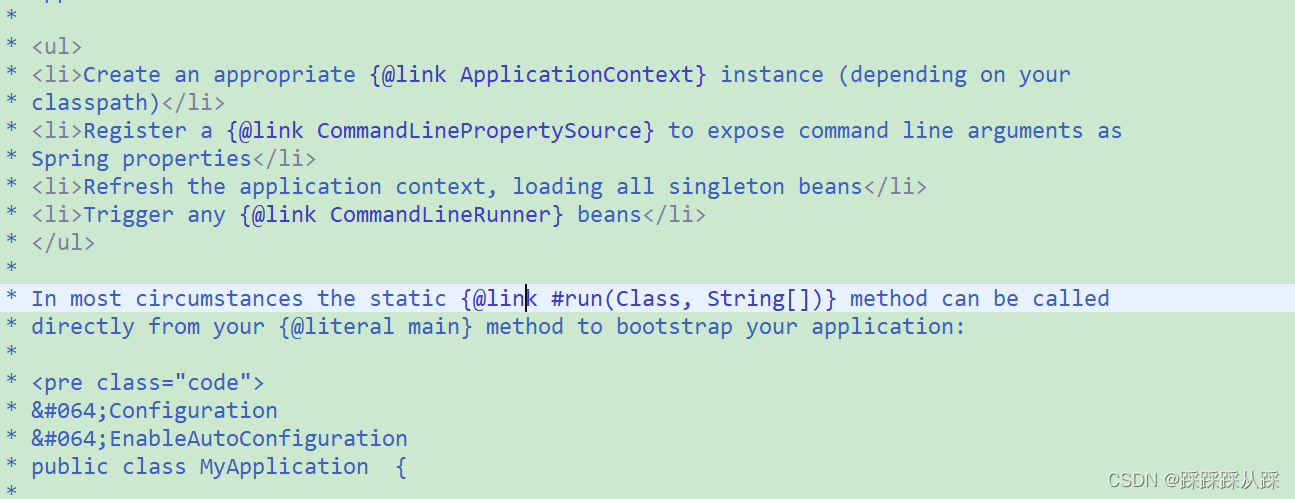
/** * Static helper that can be used to run a {@link SpringApplication} from the * specified source using default settings. * @param primarySource the primary source to load * @param args the application arguments (usually passed from a Java main method) * @return the running {@link ApplicationContext} */ public static ConfigurableApplicationContext run(Class<?> primarySource, String... args) { return run(new Class<?>[] { primarySource }, args); }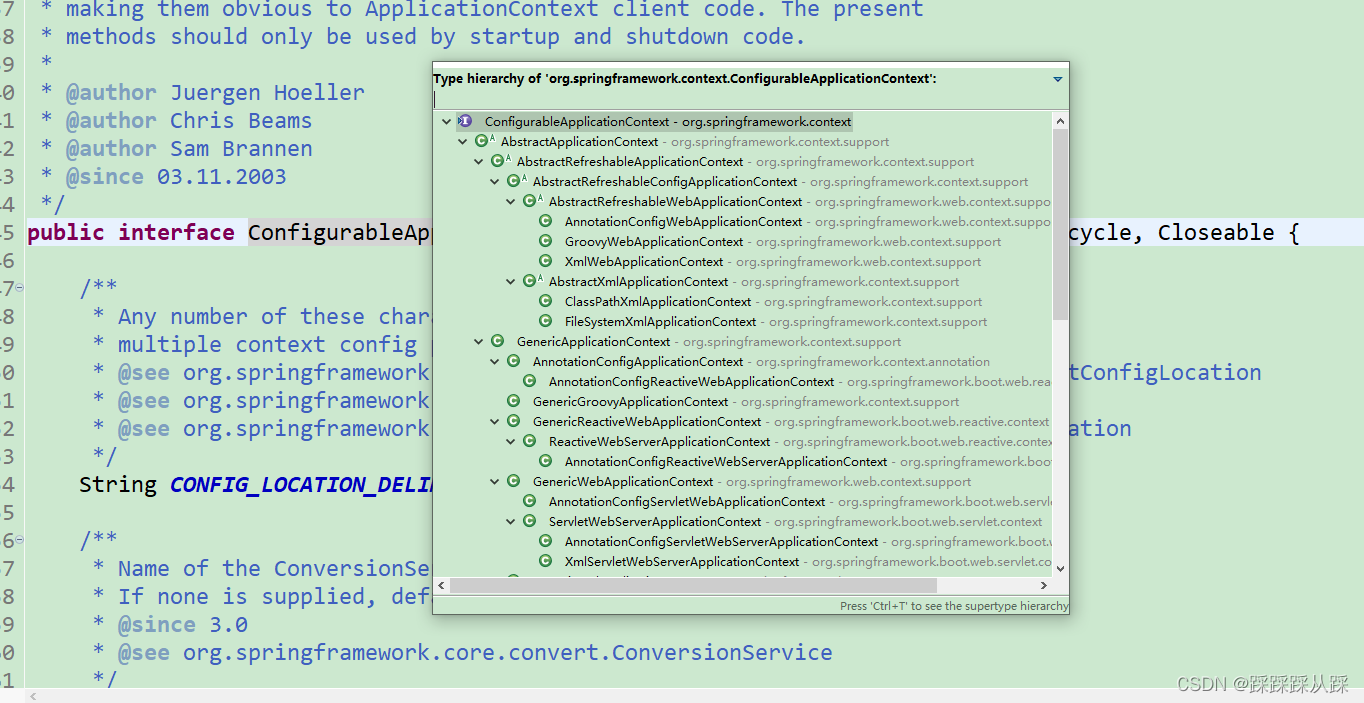
该类,该类可用于从Java main引导和启动Spring应用程序方法。默认情况下,类将执行以下步骤来引导申请:
下面的步骤 核心逻辑 就是 创建 applicationcontext 实例、
并且 注册 CommandLinePropertySource
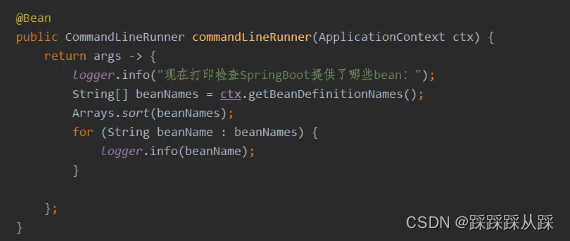
激活 CommandLineRunner 这个接口 用于指示当bean包含在 一个{@link SpringApplication}。可以定义多个{@link CommandLineRunner}bean 在同一个应用程序上下文中,可以使用{@link ordered} 接口或{@link Order@Order}注释。 也就是说可以 查看当前springapplication创建了那些bean.
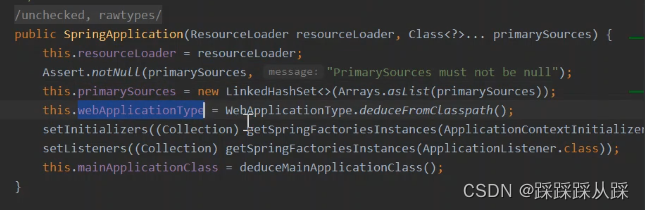
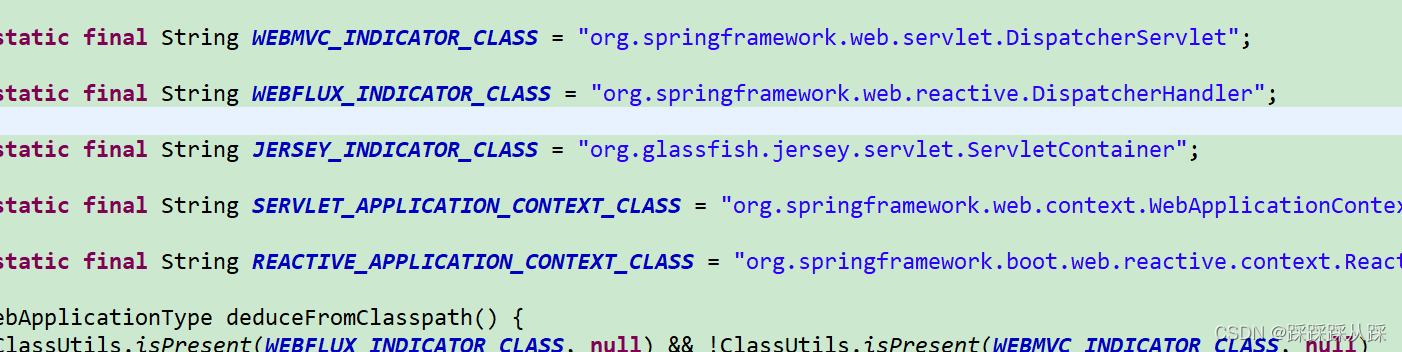
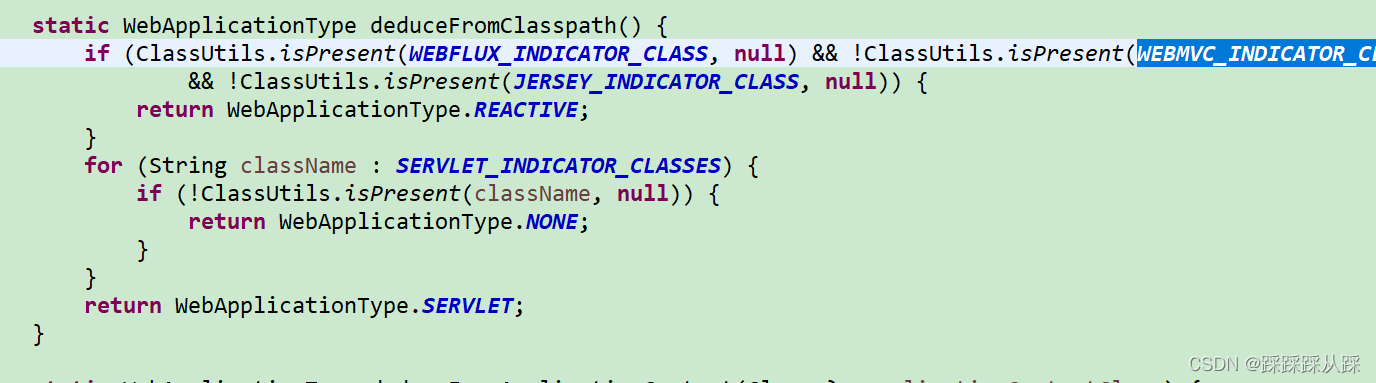
/**一:注释上的重要信息: 1、primary sources:application context从primarySource加载beans 2、创建的SpringApplication实例在调用它的run(String...)方法前,可对其进行定制化设置 可以进行哪些设置?看类中提供的public方法。 * Create a new {@link SpringApplication} instance. The application context will load * beans from the specified primary sources (see {@link SpringApplication class- level} * documentation for details. The instance can be customized before calling * {@link #run(String...)}. * @param resourceLoader the resource loader to use * @param primarySources the primary bean sources * @see #run(Class, String[]) * @see #setSources(Set) */@SuppressWarnings({ "unchecked", "rawtypes" }) public SpringApplication(ResourceLoader resourceLoader, Class<?>... primarySources) { //二、构造方法中的逻辑: this.resourceLoader = resourceLoader; // 1、一定要指定primarySources Assert.notNull(primarySources, "PrimarySources must not be null"); this.primarySources = new LinkedHashSet<>(Arrays.asList(primarySources)); // 2、deduce(推断)web类型(servlet、reactive、NoWeb) this.webApplicationType = WebApplicationType.deduceFromClasspath(); // 3、从META-INF/spring.factories中获取 ApplicationContextInitializer setInitializers((Collection) getSpringFactoriesInstances( ApplicationContextInitializer.class)); // 4、从META-INF/spring.factories中获取 ApplicationListener setListeners((Collection) getSpringFactoriesInstances(ApplicationListener.class)); // 5、推断执行的main方法的定义类 this.mainApplicationClass = deduceMainApplicationClass(); }webApplicationType 探测分配 是什么类型的 项目 ,其实是很简单的。 主要是判断 是否存在 父类
创建获取实例, 将监听器都放进去就可以了。
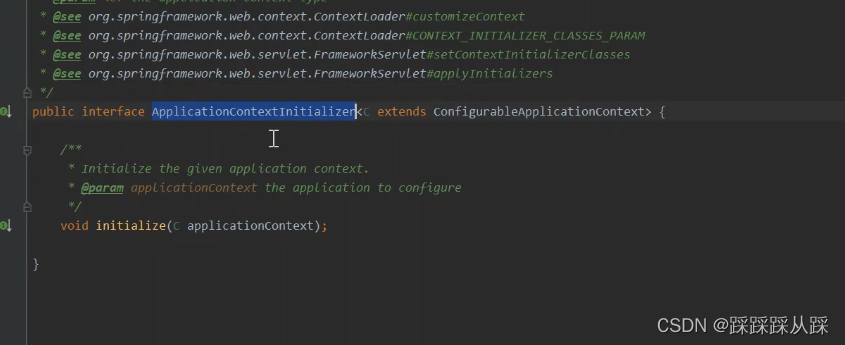
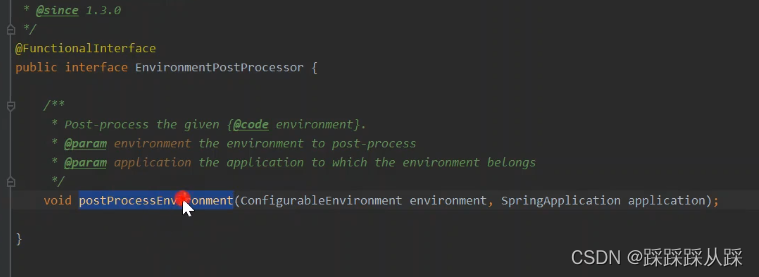
对于ApplicationContextInitializer
在初始化的时候会去调用
以及ApplicationListener 是作为监听器存在的。
SpringApplication.run()实例方法解读
/** 一:注释上的重要信息: 运行Spring application,创建并刷新一个 ApplicationContext * Run the Spring application, creating and refreshing a new * {@link ApplicationContext}. * @param args the application arguments (usually passed from a Java main method) * @return a running {@link ApplicationContext} */ public ConfigurableApplicationContext run(String... args) { // 二、方法中的逻辑: // 1 StopWatch开启计时 StopWatch stopWatch = new StopWatch(); stopWatch.start(); ConfigurableApplicationContext context = null; Collection<SpringBootExceptionReporter> exceptionReporters = new ArrayList<> (); // 这是设置系统属性java.awt.headless,请百度了解 java.awt.headless的用途。 configureHeadlessProperty(); // 2、获取到 META-INF/spring.factories中配置的SpringApplicationRunListener // 疑问:又出一个Listener,这个SpringApplicationRunListener是监听什么的? // 通过它的接口定义、注释了解它的用途 SpringApplicationRunListeners listeners = getRunListeners(args); // 这里就调用它的starting() listeners.starting(); try { // 命令行参数包装为了ApplicationArguments ApplicationArguments applicationArguments = new DefaultApplicationArguments( args); // 3、准备好了Environment,此刻Environment中都有哪些配置参数了? ConfigurableEnvironment environment = prepareEnvironment(listeners, applicationArguments); configureIgnoreBeanInfo(environment); // 4、打印springboot LOGo图标 Banner printedBanner = printBanner(environment); // 5、创建ApplicationContext context = createApplicationContext(); // 6、获取到 META-INF/spring.factories中配置的SpringBootExceptionReporter exceptionReporters = getSpringFactoriesInstances( SpringBootExceptionReporter.class, new Class[] { ConfigurableApplicationContext.class }, context); // 7、准备ApplicationContext prepareContext(context, environment, listeners, applicationArguments, printedBanner); // 8、刷新ApplicationContext refreshContext(context); afterRefresh(context, applicationArguments); stopWatch.stop(); if (this.logStartupInfo) { new StartupInfoLogger(this.mainApplicationClass) .logStarted(getApplicationLog(), stopWatch); }// 9、发布started事件 listeners.started(context); // 10、执行所有的Runners callRunners(context, applicationArguments); }catch (Throwable ex) { handleRunFailure(context, ex, exceptionReporters, listeners); throw new IllegalStateException(ex); } try { // 11、发布running中事件 listeners.running(context); }catch (Throwable ex) { handleRunFailure(context, ex, exceptionReporters, null); throw new IllegalStateException(ex); } // 12、返回ok的ConfigurableApplicationContext return context; }configureHeadlessProperty 方法 该方法只做了一件事:设置了一个名为java.awt.headless的系统属性
private void configureHeadlessProperty() { System.setProperty(SYSTEM_PROPERTY_JAVA_AWT_HEADLESS, System.getProperty(SYSTEM_PROPERTY_JAVA_AWT_HEADLESS, Boolean.toString(this.headless))); }SpringApplicationRunListeners 返回的所有 SpringApplicationRunListener 监听器 , 这里面就是 监听 它失败 等等状态。
private SpringApplicationRunListeners getRunListeners(String[] args) { Class<?>[] types = new Class<?>[] { SpringApplication.class, String[].class }; return new SpringApplicationRunListeners(logger, getSpringFactoriesInstances(SpringApplicationRunListener.class, types, this, args), this.applicationStartup); }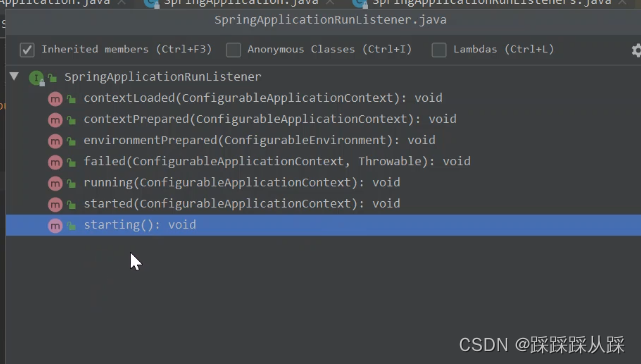
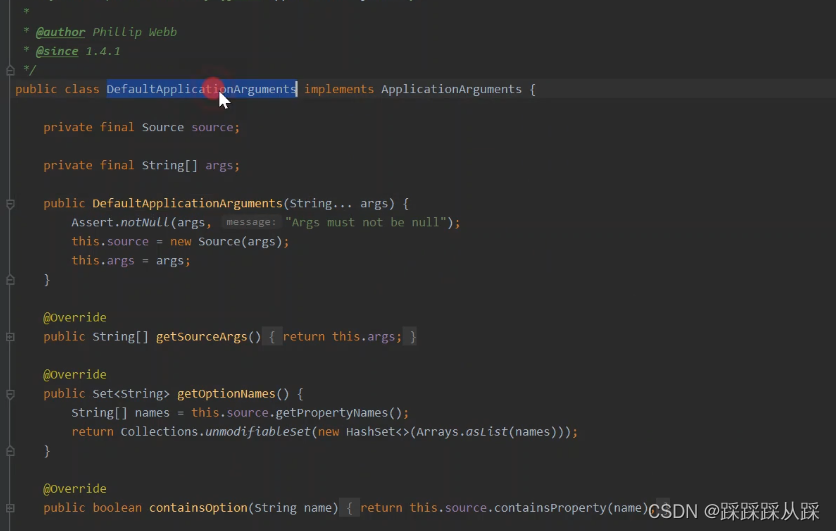
准备参数 DefaultApplicationArguments 本身需要处理
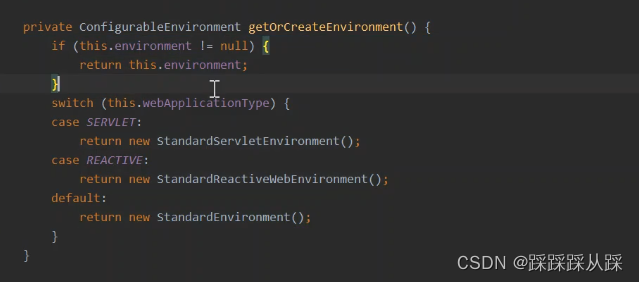
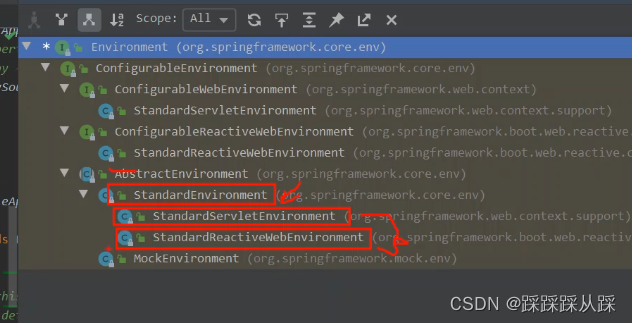
其中比较重要的prepareEnvironment Environment中都有哪些配置参数
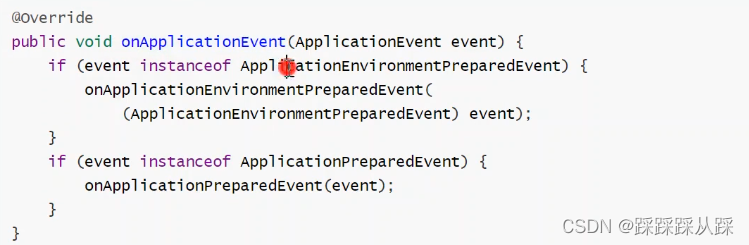
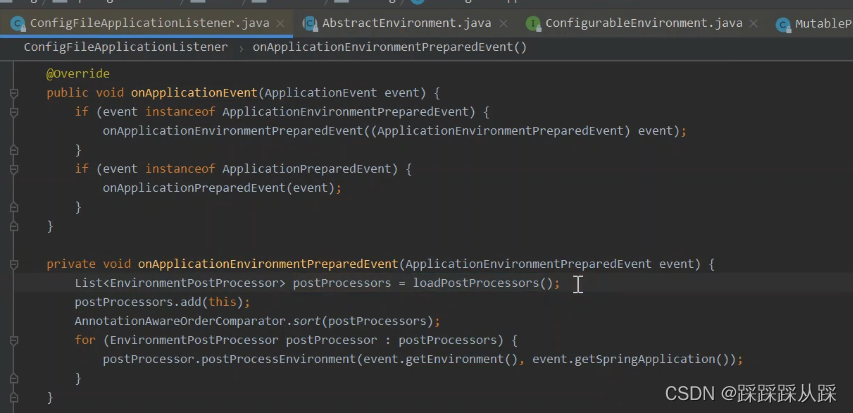
触发RunListener环境准备完成回调
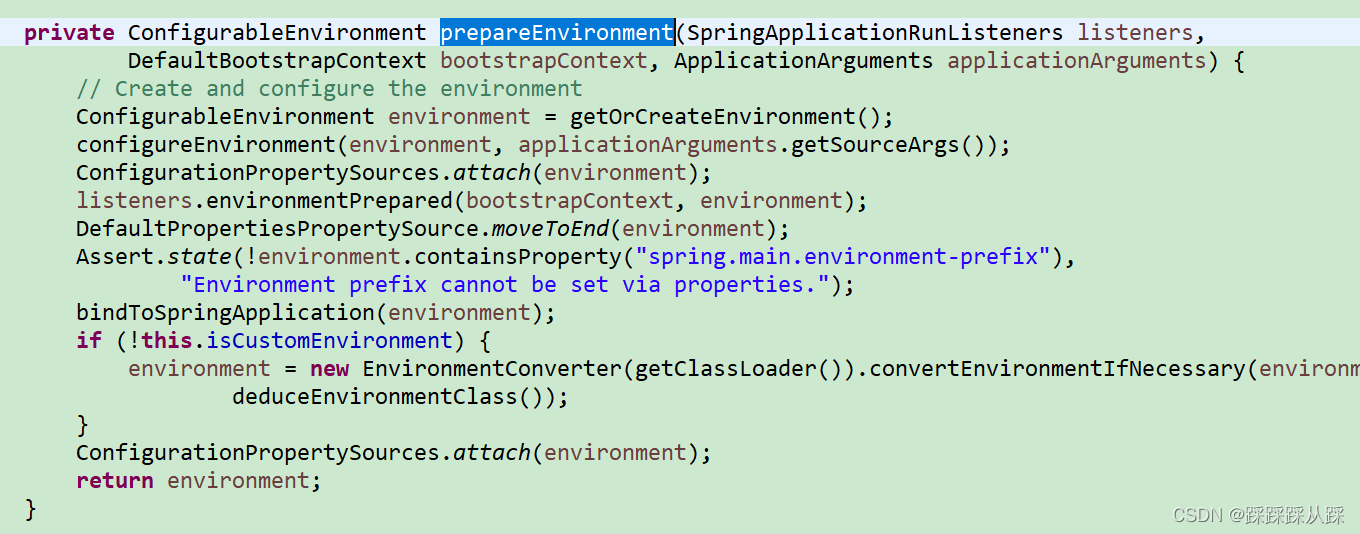
根据类型加载 不同的参数。
ConfigurationPropertySources
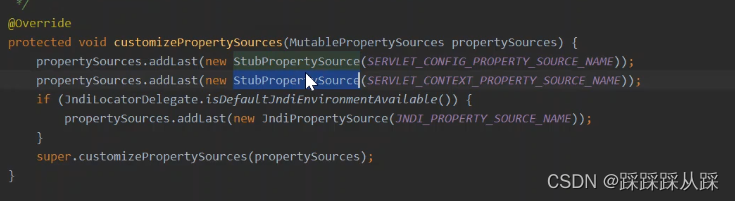
包括各种 的配置启用的profiles 也可以指定 profiles 所以可以取出来做处理。
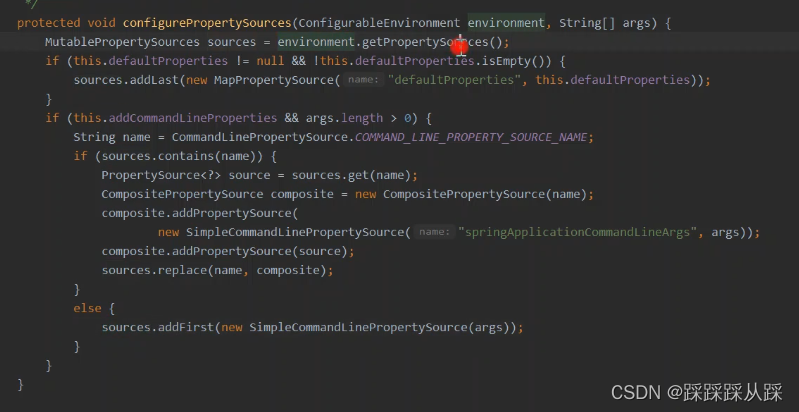
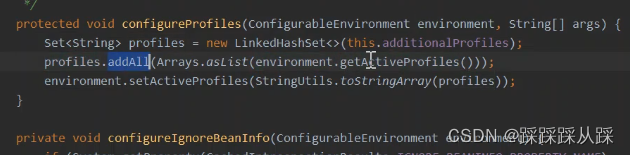
环境上准备 就有的这个。 参数配置
这里面就是 加载的配置参数。
会将事件给发布出来。
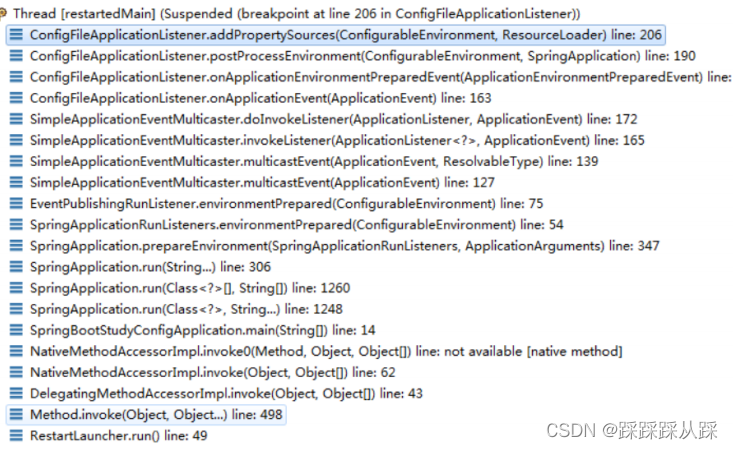
完整的加载过程。
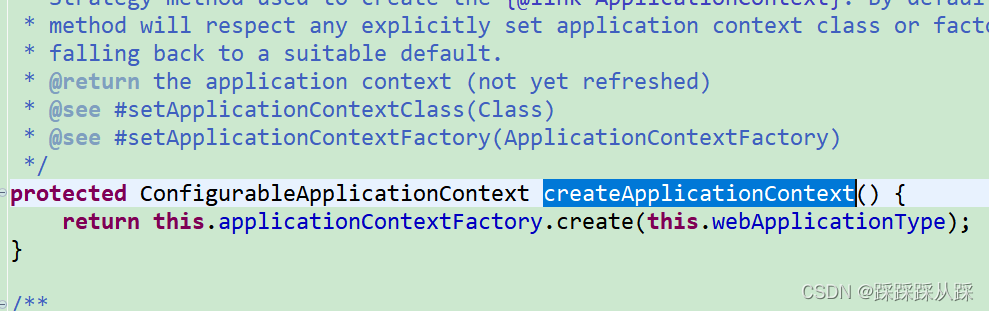
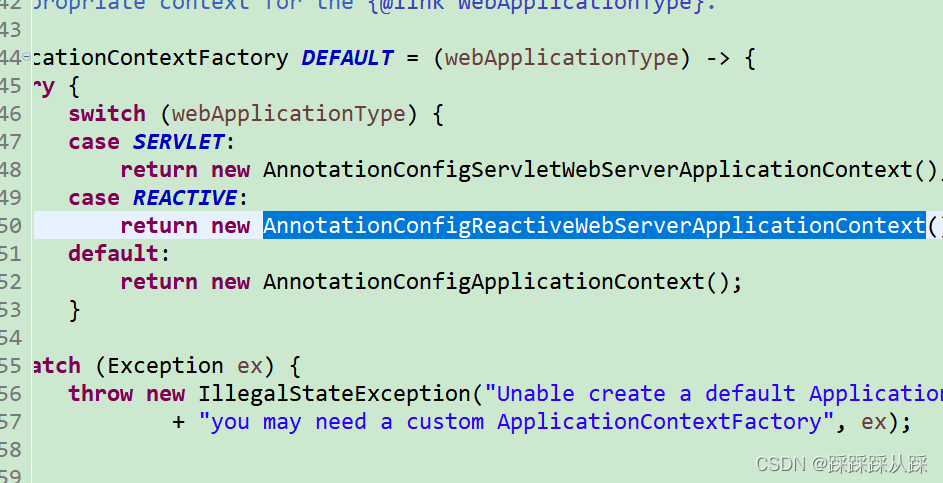
createApplicationContext

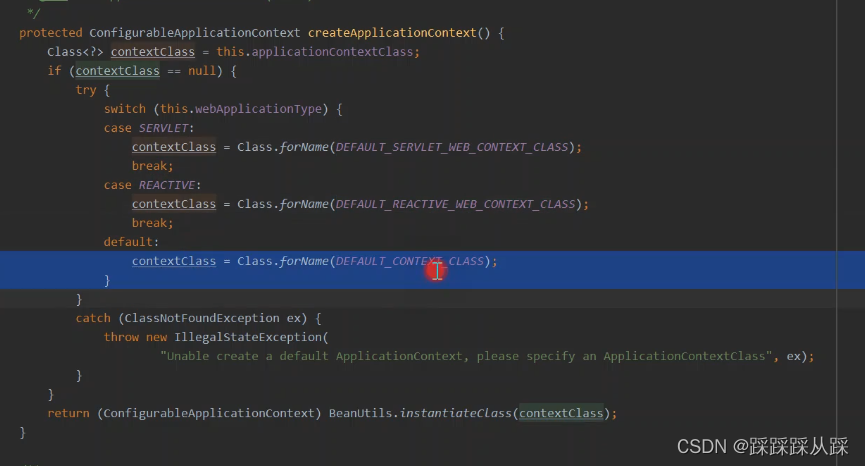
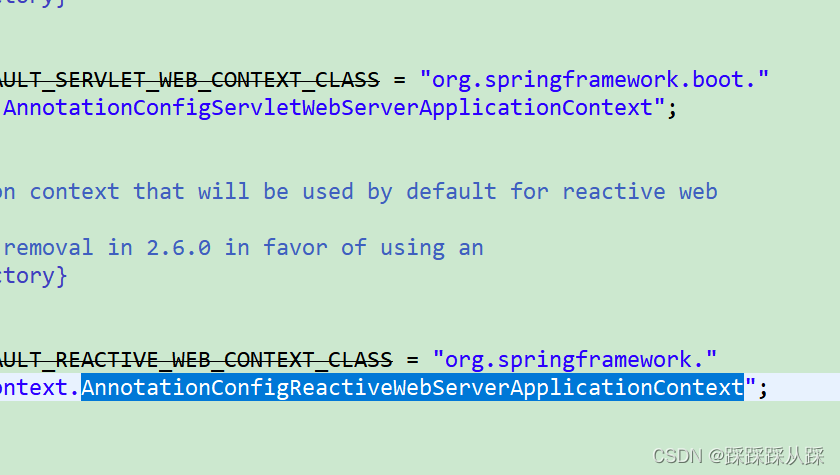
在新版本中是添加
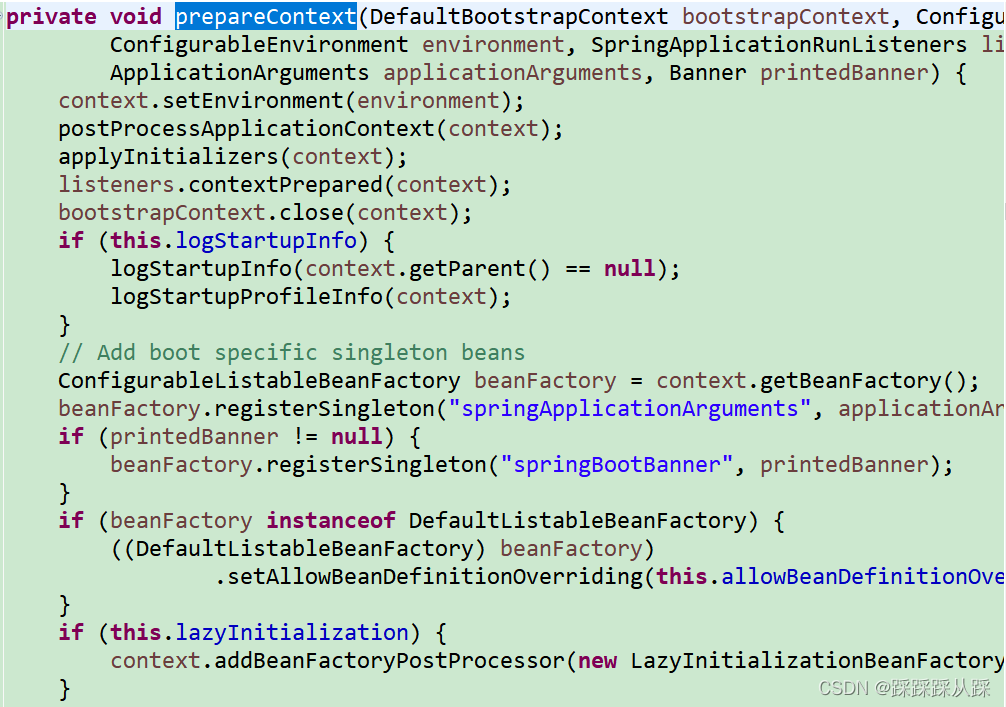
准备过程
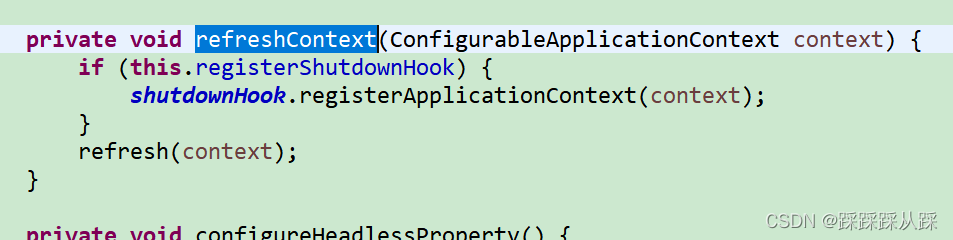
refreshcontext 刷新
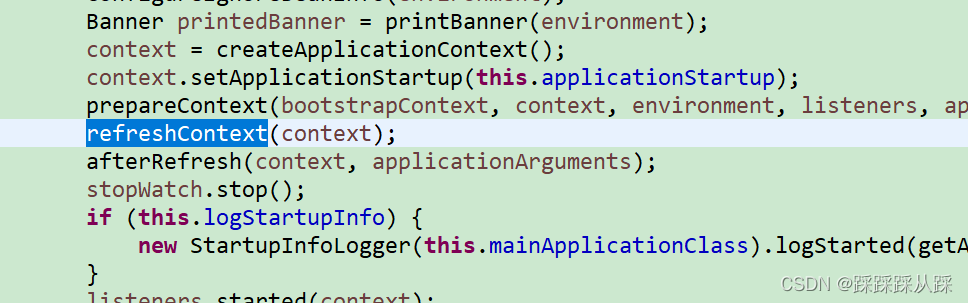
这里最终调用 的applicationcontext. refresh方法。
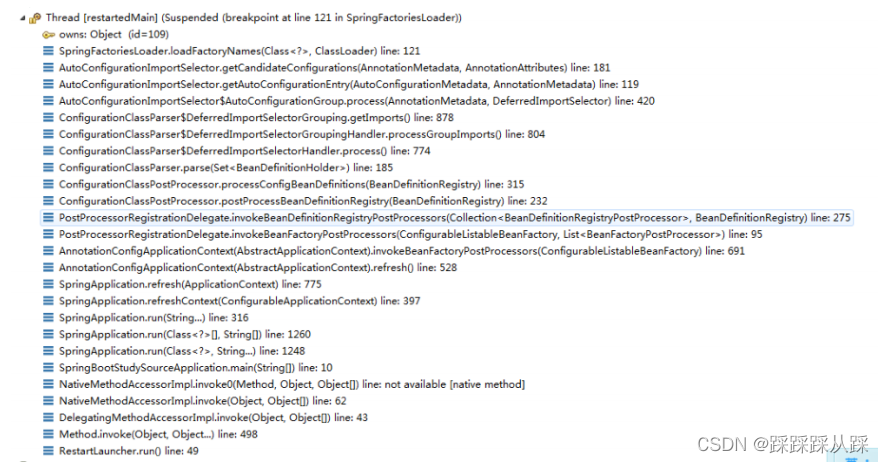
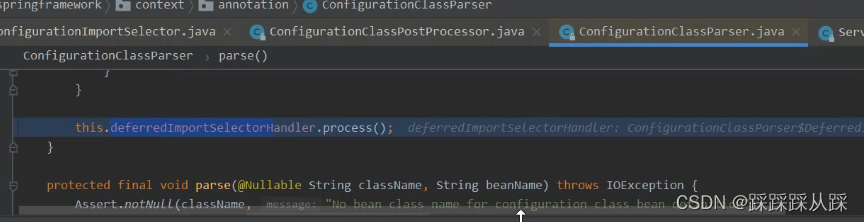
auto configuration的bean定义加载
这个加载是整个 创建基础。
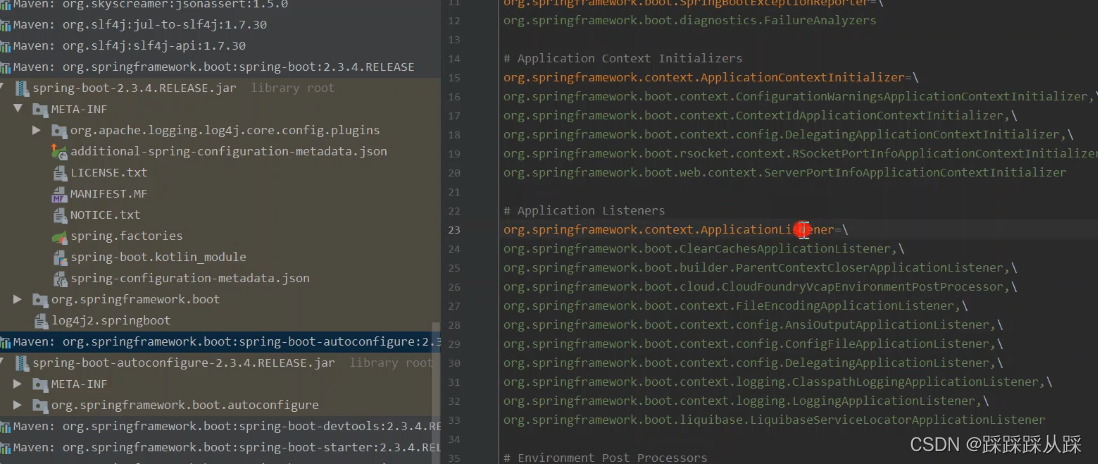
// 3、从META-INF/spring.factories中获取ApplicationContextInitializer setInitializers((Collection) getSpringFactoriesInstances( ApplicationContextInitializer.class));这个方法 是可以加载 spring.factories
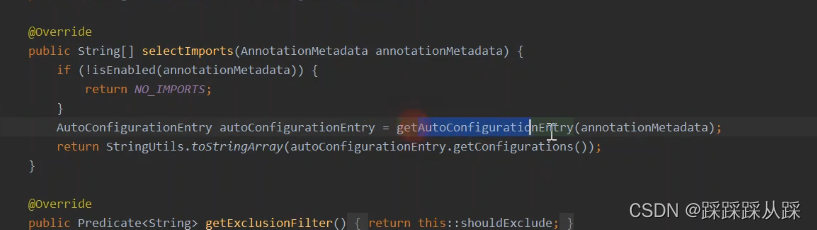
但是对于 EnableAutoconfiguration 的加载 是在那里去加载的,暂时不知道。
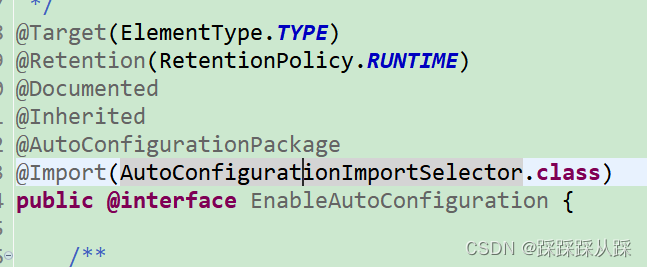
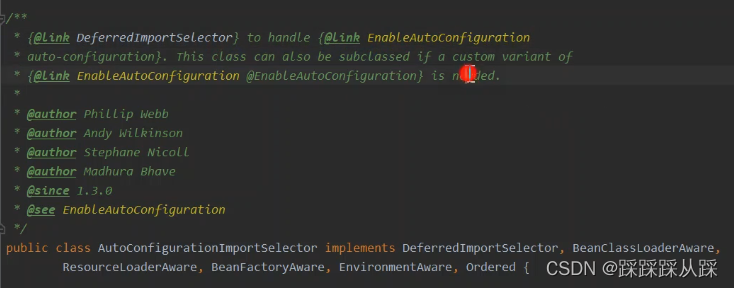
public class AutoConfigurationImportSelector implements DeferredImportSelector, BeanClassLoaderAware, ResourceLoaderAware, BeanFactoryAware, EnvironmentAware, Ordered {}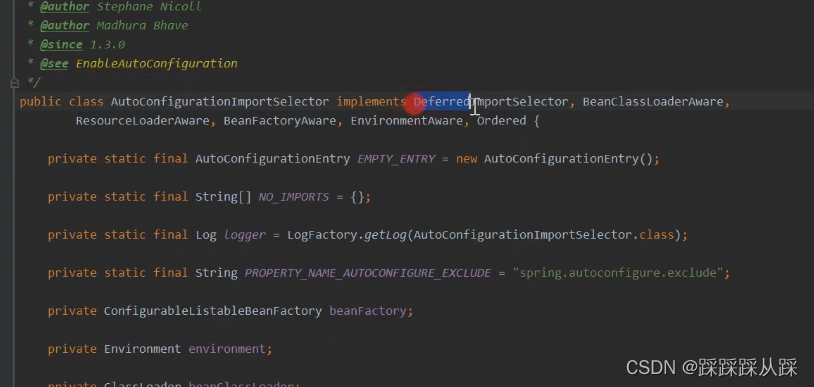
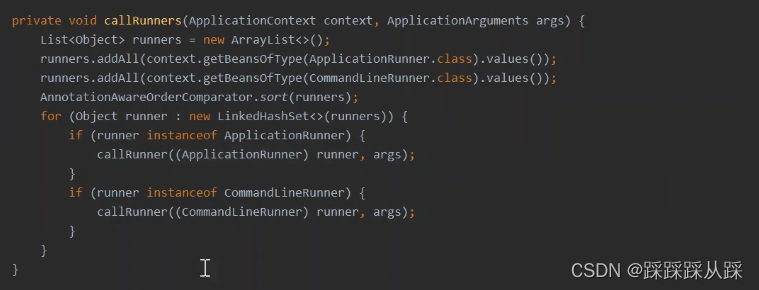
callRunners(context, applicationArguments)
public class AnnotationConfigServletWebServerApplicationContextextends ServletWebServerApplicationContext implements AnnotationConfigRegistry {}
@Override public WebServer getWebServer(ServletContextInitializer... initializers) { if (this.disableMBeanRegistry) { Registry.disableRegistry(); } Tomcat tomcat = new Tomcat(); File baseDir = (this.baseDirectory != null) ? this.baseDirectory : createTempDir("tomcat"); tomcat.setBaseDir(baseDir.getAbsolutePath()); Connector connector = new Connector(this.protocol); connector.setThrowOnFailure(true); tomcat.getService().addConnector(connector); customizeConnector(connector); tomcat.setConnector(connector); tomcat.getHost().setAutoDeploy(false); configureEngine(tomcat.getEngine()); for (Connector additionalConnector : this.additionalTomcatConnectors) { tomcat.getService().addConnector(additionalConnector); } prepareContext(tomcat.getHost(), initializers); return getTomcatWebServer(tomcat); }热门文章
- 「2月15日」最高速度21.8M/S,2025年Hiddify每天更新免费订阅节点地址分享
- 猫亲近人有什么寓意(猫 亲近)
- 数据库事务四大特性、四大隔离级别以及解决的三种问题
- 「1月17日」最高速度21.2M/S,2025年Hiddify每天更新免费订阅节点地址分享
- 「1月30日」最高速度22.2M/S,2025年Hiddify每天更新免费订阅节点地址分享
- 「2月18日」最高速度18M/S,2025年Hiddify每天更新免费订阅节点地址分享
- 济南哪里有领养猫的地方 济南哪里有领养猫的地方啊
- 【impala】python通过kerberos连接impala操作hive,及解决遇到的问题
- 「1月11日」最高速度23M/S,2025年Hiddify每天更新免费订阅节点地址分享
- 「2月5日」最高速度21.7M/S,2025年Hiddify每天更新免费订阅节点地址分享